DIY Earrings Box Frame Pin Board

photo(5)

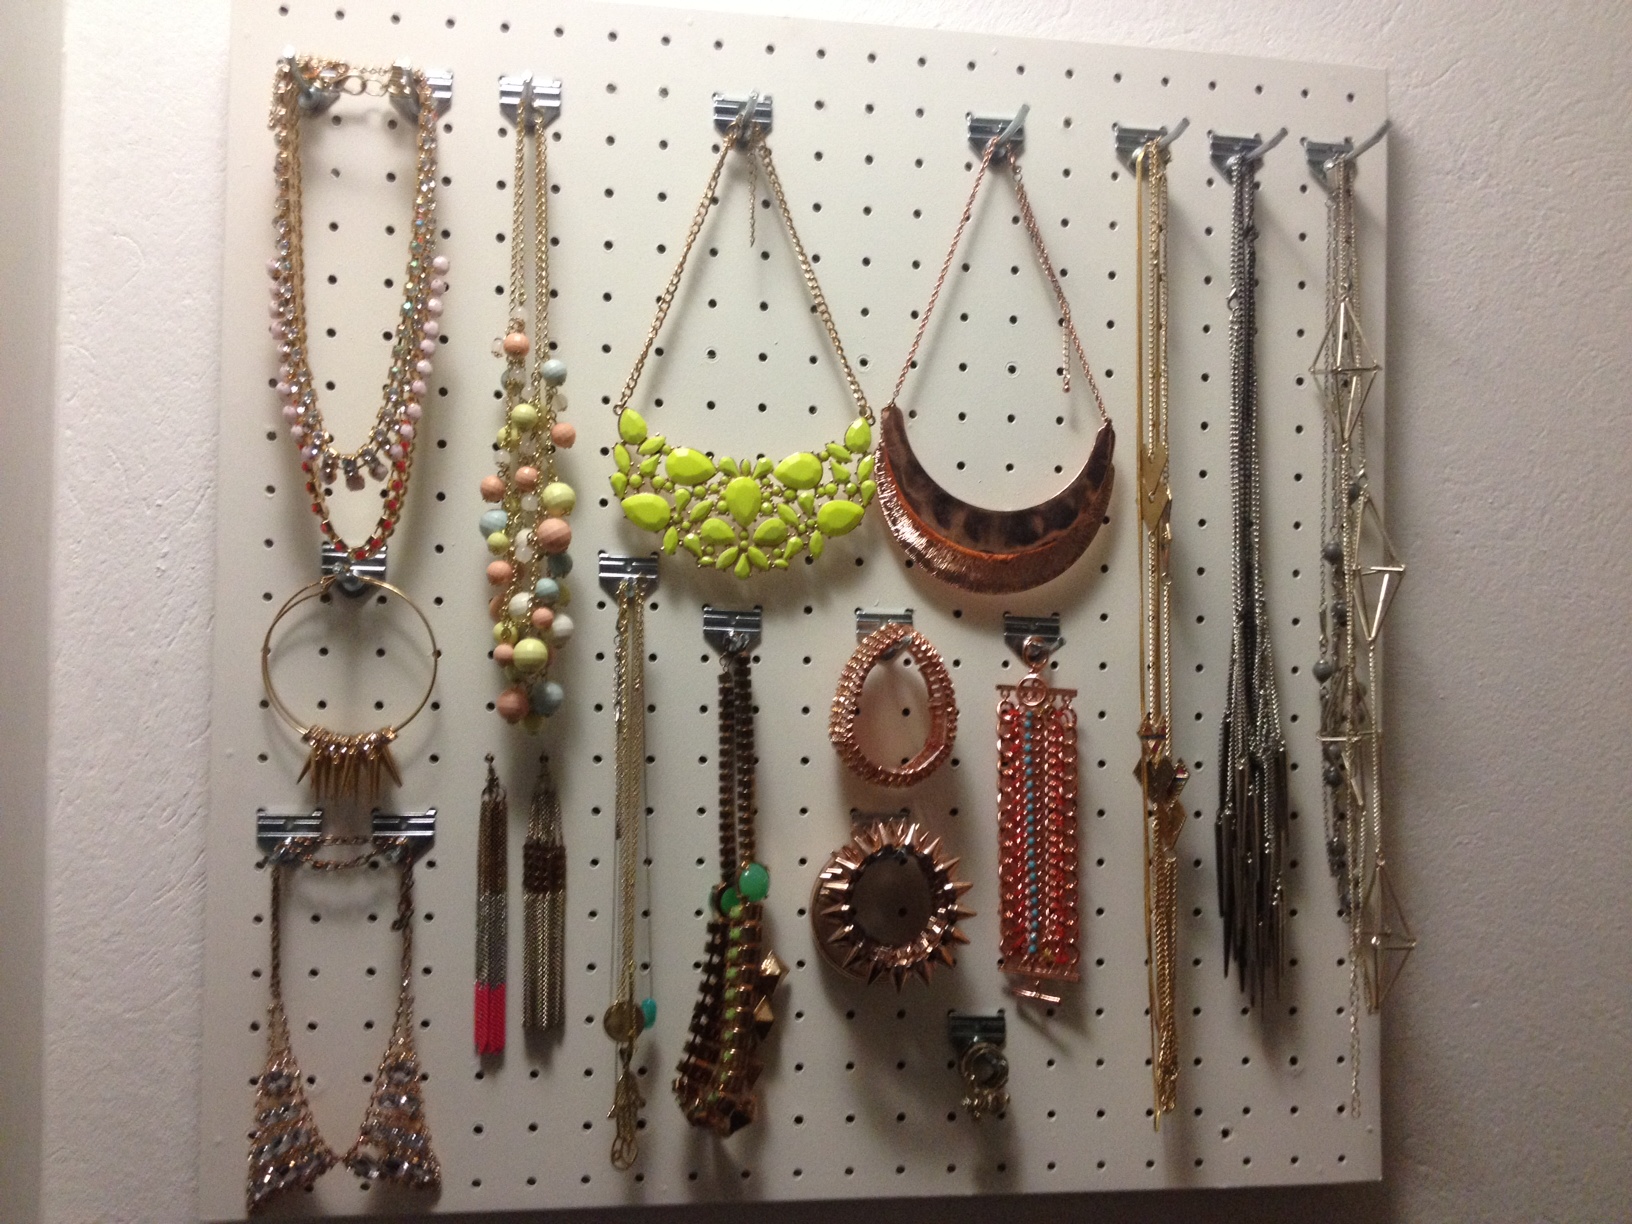
This is the second installment to my Jewelry Peg Board. After making my peg board, I realized I needed a solution to storing and organizing all of my earrings. They all lie around in various jewelry boxes and on night stands.

I decided that perhaps making a sort of pin board would work well seeing that most of my earrings are studs and thus can be pinned into a board of some sort. I popped by PNA last weekend and saw polystyrene sheets, cork and a wooden box frame…and suddenly it all became clear:) BTW PNA has probably the most amazing range of art and craft supplies!

So lets start with supplies:

photo(6)

  • Wooden box frame
  • Sheet of polystyrene, about 2-3cm thick
  • Sheet of cork
  • Glue. I first thought Modge Podge would work but ended up using Spay Adhesive as this worked way better! (the Modge Podge did not work at all- so ignore it in the picture)
  • Cutting knife, make sure it is sharp
  • paint or spray paint of your choice
  • drill and small drill bit (optional)
  • small screw in circular hooks (optional)
  • pen, ruler and measuring tape
  1. Paint your box frame. I painted mine white as I felt it would make my jewelry pop when in the frame. Spay painting would be quicker- but I again was all out and feeling very impatient.
  2. Measure the inside of your box frame and cut your sheet of polystyrene to size.  Try cut it a few millimeters bigger than the inside of the box frame. Place your piece of polystyrene inside the box frame and test if it fits. If the frame of your box frame is a little bigger than the inside of the box (thus preventing you from sliding it right in due to an overlap of the frame) just cut the sheet of polystyrene down the middle. Then place the pieces into the box frame- they will fit together again once inside, and you wont see the cut line as you will place the cork sheet over it. If it fits snug enough you won’t have to glue it in place. Polystyrene has a bit of flexibility in the fact that it can be slightly compressed into a shape. If you do need to glue it in place, look for a glue safe to use on polystyrene/Styrofoam etc. If not it will melt it!!!
  3. Cut your piece of cork to size to fit over the polystyrene. Now this has to be just the right size. My sheet I bought was a couple of centimeters too short, so I was left with a small strip of the polystyrene peaking though. I just covered this with a strip of white card.
  4. Spray the polystyrene with the Spray Adhesive. Make sure you cover the whole surface area, but avoid spraying the insides and inner frame walls of the box.
  5. Quickly and carefully line up the cork board over the polystyrene and press down into place. smooth out any air bubbles or bumps.
  6. Let dry
    photo(7)
  7. Now if you want to hang some earrings withing your frame, you can add screw in circular hooks. These work well with clip on earrings or earrings that don’t have a straight pin backing. Measure out and mark where you want to place the hooks on the outside of the box. Use a thin drill bit to drill the holes so that you can screw in the hooks.                                                                                                                                                       photo(8)
  8. Screw in your hooks on the inside of the framephoto(9)photo(10)

Now you are ready to place all or your earrings!!! Now you are probably wondering where all the backings for your earrings go, I just popped them on the inside of the box frame as it creates a shelf to place bits and bobs.

You can either place your earrings pin board on a shelf or mount on a wall. I am going to mount mine on the wall next to my Jewelry Peg Board:)

Happy Crafting!

DIY Jewelry Peg Board

photo(2)

My DIY Jewelry Peg Board

This is a quick DIY I put together over the weekend. I acquired an old wooden peg board from work and knew immediately it was destined for glory:)                                                  I have seen quite a few cool ideas and solutions for Jewelry organization on Pinterest, and have been wanting to organize my loot for quite a while.

I just gave the peg board a fresh layer of white paint(spray paint would have been quicker, but I was all out) and bought some of the pegs from one of my favorite places to shop- Builders Warehouse.

peg length- about 6cm

peg length- about 6cm

The pegs come in all different lengths and shapes. I went for the shortest ones as I did not need the super long pegs and feared they could be quite dangerous.

If you cannot find the wooden peg board, you can easily make your own provided you have the right tools, such as a Power Drill. Get the step by step instructions from eHow here.

I have managed so organize all my chains, bracelets and some rings, but my earrings are feeling left out:( but I have come up with a cunning plan, so watch this space for the second installment to this post;)

Happy organizing!

Dolce & Gobbana inspired DIY floral sunglasses

Source: Vogue.com

Source: Vogue.com

This must be one of my favorite DIY’s! I must admit that this is not my original idea. I was inspired by the DIY seen on Honestly WTF– see original DIY here.

What you will need:

1) Cat- Eye Sunglasses:                                                                                                        Purchase a reasonably priced pair- this is a DIY after all, so it is supposed to be cost effective;) I got mine from Cotton On for about R35.00 (they were on sale). But I have also seen them at Mr Price.

2) Ceramic Flower Beads in assorted colours and sizes:                                                 You can purchase these from specialized bead stores. I found mine at China Mall in Crown Mines, Johannesburg. See details here. They have a great bead store on the upper level. They cost between R12.00 and R34.00 for a bag, which(depending on size) had anywhere between 2 and 8 flower beads.

3) Blits Stik Super Glue:Any super glue that is safe to use on plastics will do.

How To:                                                                                                                             1) Lay out your beads and start planning where you will be placing them on the sunglasses. Divide your beads into two identical groups- one for each side of the sunglasses. The Larger flower beads will be placed on the top corner on the ‘cat-eye’ and the thicker section of the arm where it meets the front of the sunglasses. The medium and small flowers will be used around the larger ones. So the flowers will be placed from large to small.

2) drop a small amount of glue onto the ceramic flower base and immediately attach to the designated part of the sunglasses. hold down until firmly in place. Do not go over board with the glue, as it may cause frosting on the plastic and the lenses if too close to them. I used the smallest ceramic flowers to fill in the gaps in between the larger flowers as they were not only wider but taller too. this allowed the smaller flower beads to neatly sit underneath the petals of the larger flowers

3) Work on one side of the sunglasses at a time, allowing the one side to try before moving onto the next. be careful not to get the glue on your hands, body or in your eyes! If you do, immediately refer to the safety instructions on the packaging. This stuff is really sticky!!! if you do not want to get it on your hands, try using a tooth pick and tweezers to apply the glue to the ceramic flower bead, and then apply this to the sunglasses.

4) once dry…ENJOY!

For a more in depth guide to this DIY you can have a look at Honestly WTF tutorial which comes complete with pictures along the way. I made mine without thinking that I would do a blog post on it. I now know for next time;)

Welcome to my Blog!

So this is my first blog…and this is my first post. How did I end up here? I have a passion for all things DIY and have been creating since a very young age. I love making stuff for myself and others- whether it be clothing, home decor, accessories or giving myself an awesome manicure. So why a DIY Blog? well, to feed my desire for all things DIY I became hooked on Pinterest and DIY blogs such as P.S- I made this. The only problem is that all the supplies I see online, I cannot get in South Africa. So I have had to adapt and figure out how to do it here and substitute materials and supplies. I have made some amazing discoveries along the way and come up with some of my own DIY concepts and projects. So I thought, why not share this with other aspiring DIY lovers from my continent and abroad. So watch this space for my first DIY project how-to!